Choosing the Right Gate Automation System for Your Property

Gate automation refers to the use of technology to operate and control gates automatically. There are different types of gate automation systems, which include:
- Sliding Gate Automation: This system is used for gates that slide horizontally to open and close. It typically consists of a motor, control unit, and accessories such as remote controls and safety sensors. Sliding gate automation is suitable for gates in areas where space is limited, as it doesn't require the swing radius that a swing gate requires.
- Underground Gate Automation: This system is used for gates that swing open and close. The motor and control unit are installed underground, making it a discreet option. It typically consists of a motor, control unit, and accessories such as remote controls and safety sensors. Underground gate automation is an excellent option for homeowners who want to maintain the aesthetic appeal of their property as it's hidden.
- Above Ground Gate Automation: This system is used for gates that swing open and close. The motor and control unit are installed above ground, either on the gate or adjacent to it. It typically consists of a motor, control unit, and accessories such as remote controls and safety sensors. Above ground gate automation is a popular choice for residential and commercial properties, as it's easy to install and maintain.
Here are additional extras that can be added to gate automation systems:
- Intercoms: Intercoms allow communication between visitors and residents, and they can be installed at the entrance gate or on the property. Intercoms can be audio-only or include video for added security.
- Video Intercoms: Video intercoms are similar to regular intercoms but include a camera for visual identification. They're particularly useful for gated communities, as they allow residents to verify the identity of visitors before granting access.
- Push to Exit: A push to exit button is a device installed inside the property that allows authorized individuals to exit without a remote control or keypad. It's particularly useful for commercial properties, where employees or visitors need to exit frequently.
- Ground Loops: Ground loops are sensors installed under the driveway that detect the presence of a vehicle. They're particularly useful for busy properties, where the gate needs to open and close frequently. Ground loops can also be used to prevent the gate from closing on a vehicle that's still in the gate's path.
These extras can be added to any type of gate automation system, including sliding gate automation, underground gate automation, and above ground gate.
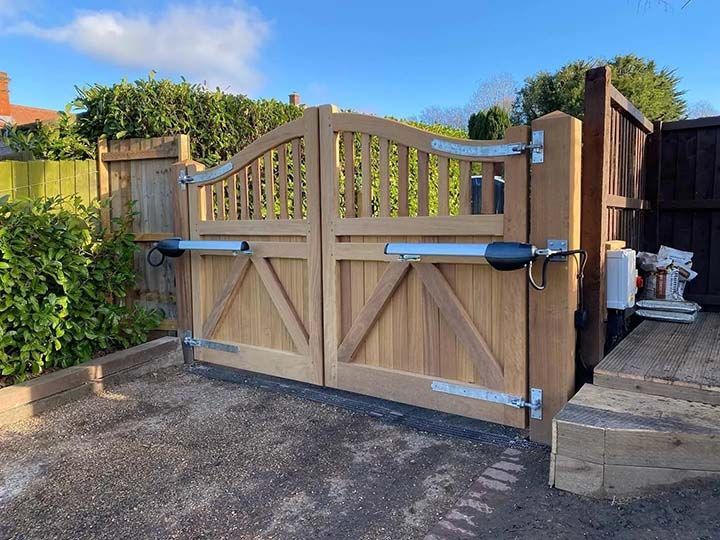
Learn the dos and don'ts of buying automatic gates for driveways, from choosing automation to planning long-term performance.
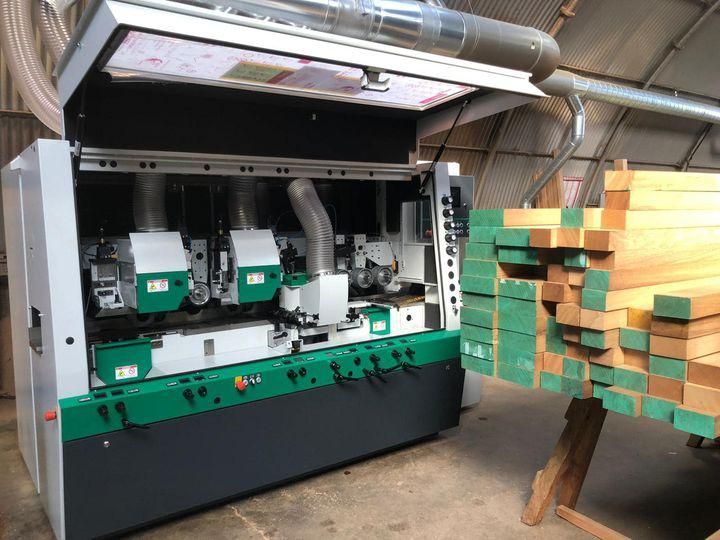
See how a Weinig moulder helps improve timber gate production, boosting efficiency, consistency and craftsmanship behind the scenes.

Discover solar gate automation for hardwood gates, a practical way to power your entrance with greater efficiency.
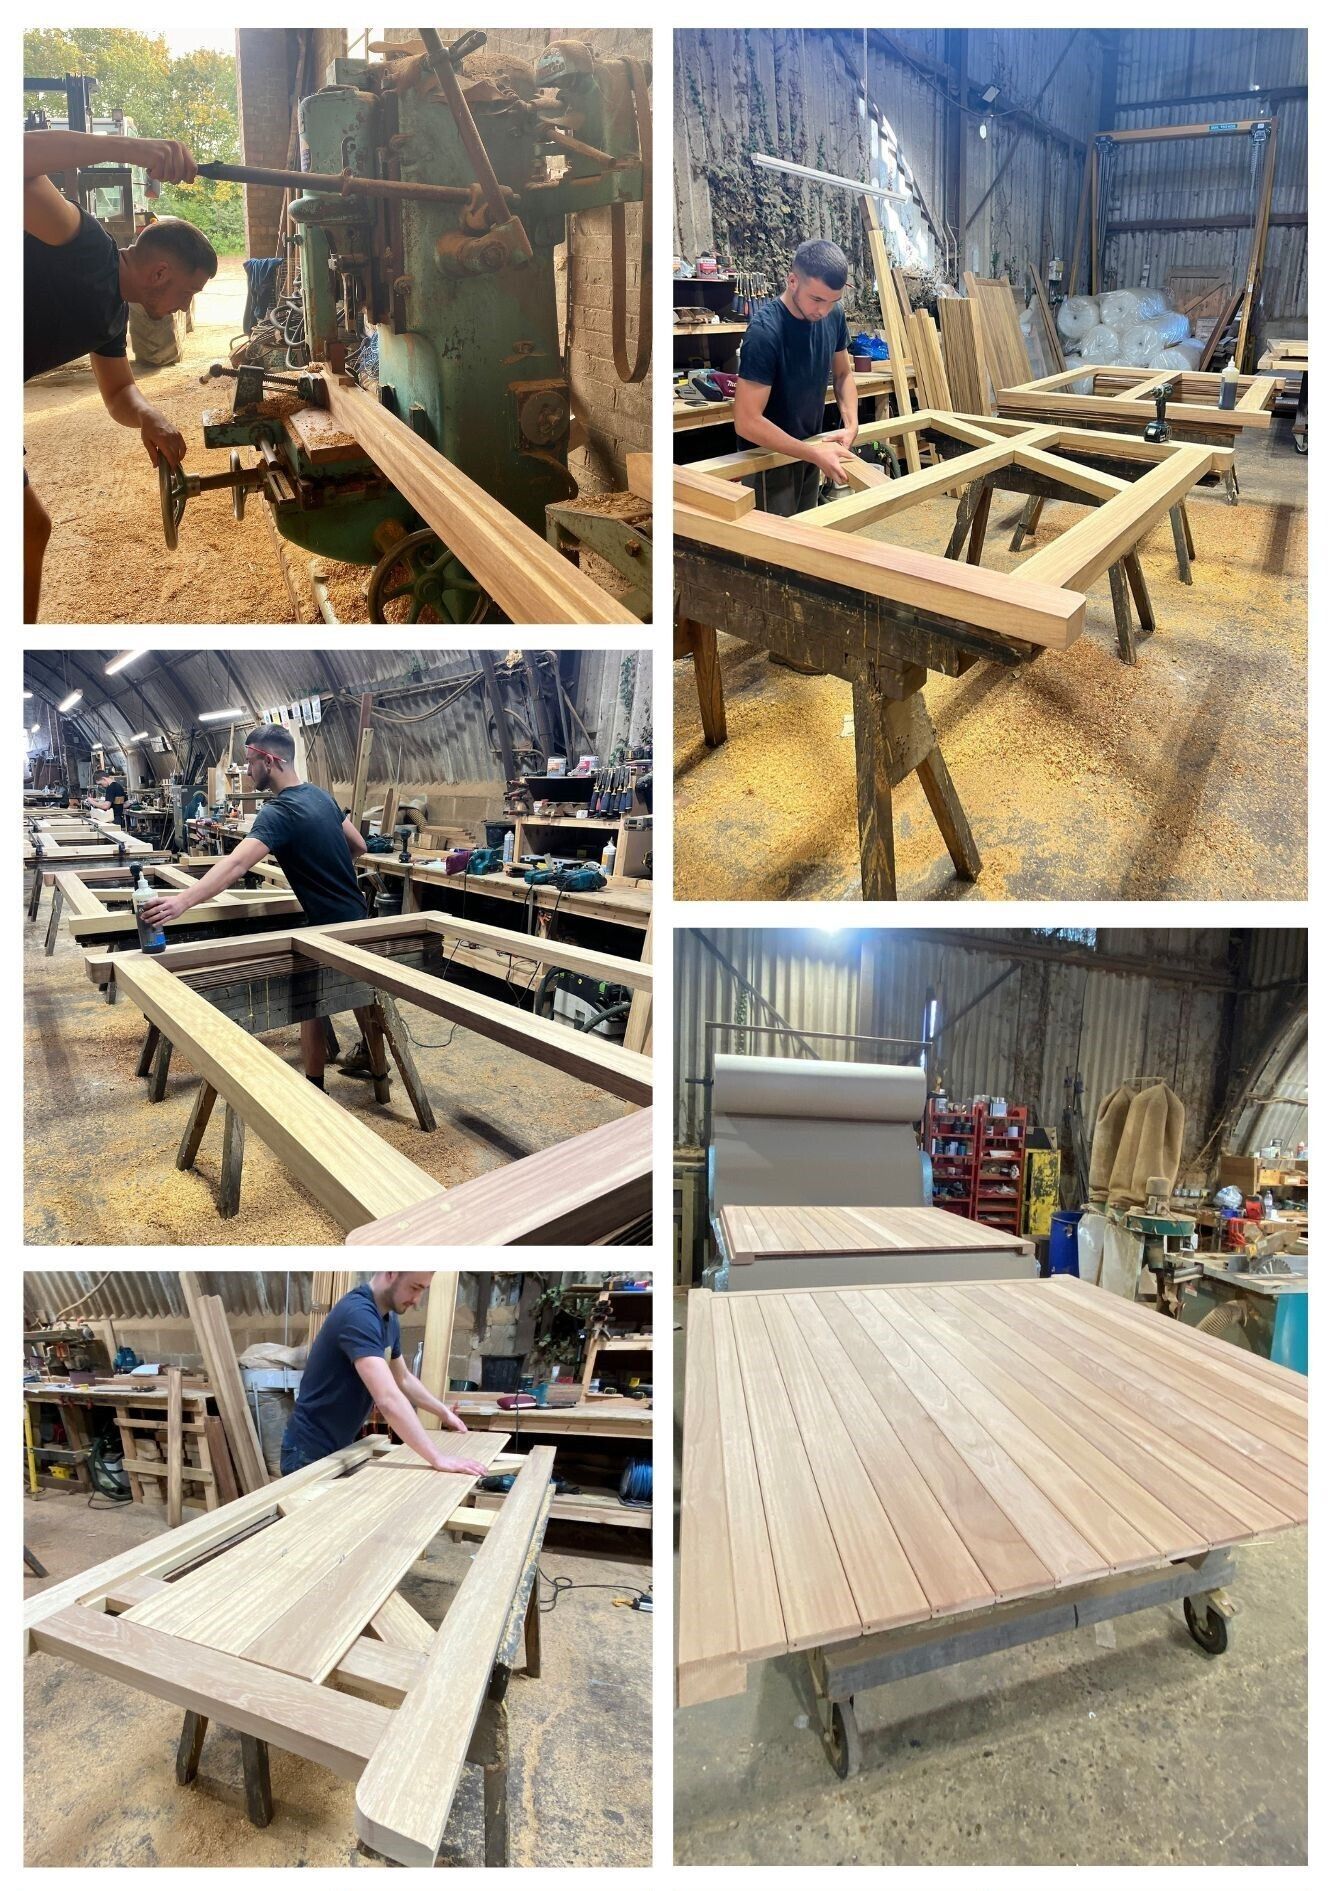
Go behind the scenes and see how hardwood gates are made, from raw timber to a handcrafted finished product.

Compare automated driveway gates vs manual gates and find the best option for your property, budget and lifestyle.

Explore the beauty and benefits of bespoke wooden driveway gates, from custom design and privacy to kerb appeal.

Read our guide to buying driveway gates, covering style, materials, automation, planning and practical considerations.
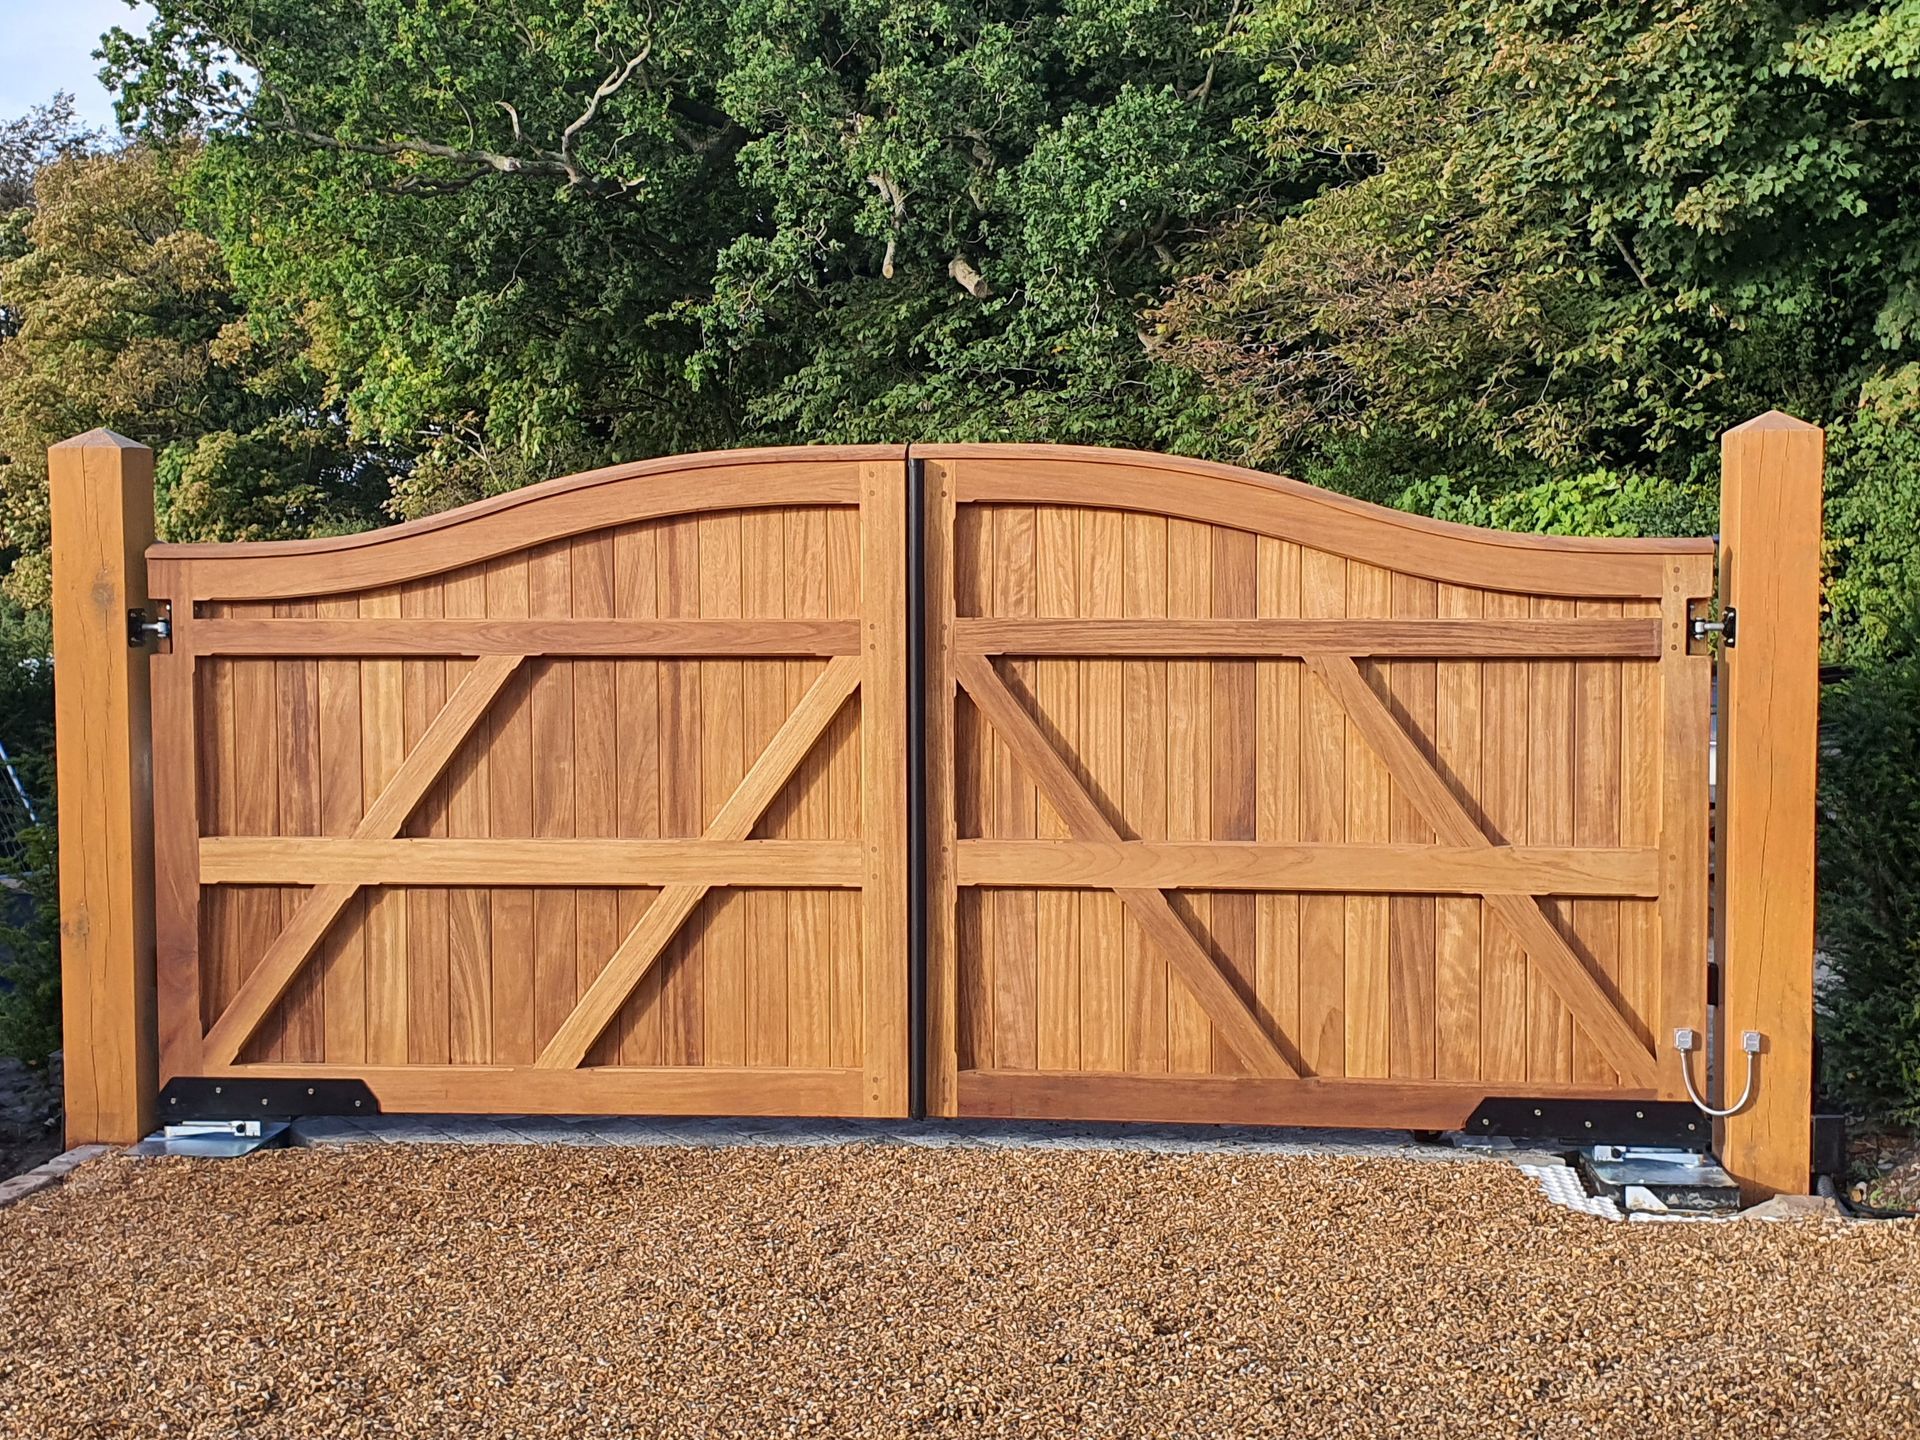
Discover the benefits of timber driveway gates, from improved kerb appeal and privacy to security and long-term value.

Compare iroko vs oak hardwood for driveway gates. Learn the key differences in appearance, durability, maintenance and cost.